Kerf guide
You’ve drawn your designs and created files, and now you would like your laser cut shapes to fit in to other laser cut shapes nice and snugly? To do this you will need to account for the “kerf”. The Kerf is the material that is removed by the laser during the cutting process. This idea is similar to what happens when cutting with a saw. If your saw blade is 3mm wide then 3mm of material will be removed completely when making a cut.
If you do not adjust the kerf, shapes will still fit together but it will be a loose fit. Our laser cutter has a kerf of roughly 0.25mm, this can vary slightly depending on what laser cutter and which materials you are using.
When adjusting shapes only half of the beam is creating the material loss, so we will use 0.125mm added and subjected from the pieces.
Here is a diagram showing what material is lost when cutting:

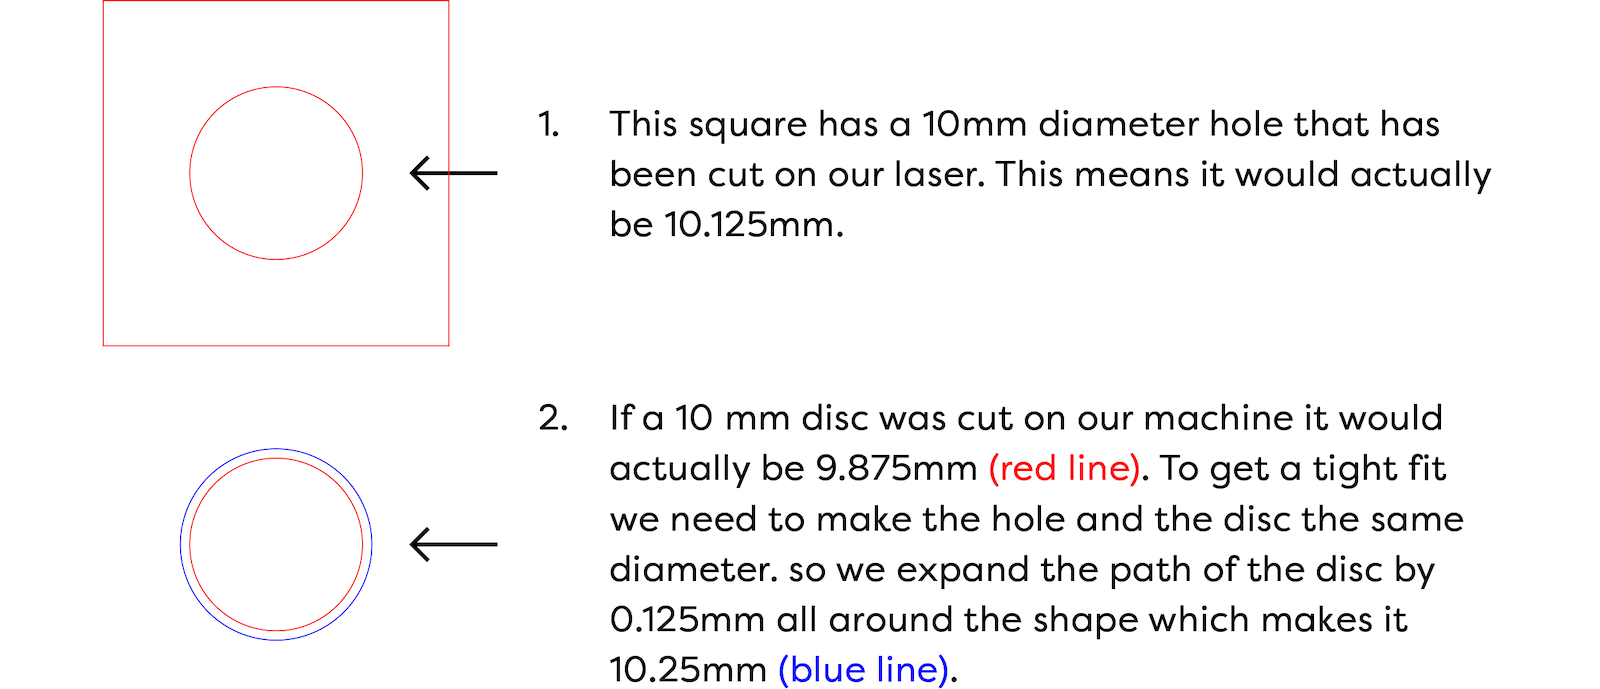
Below is a diagram that should help you understand how to adjust your designs:
Tips
For more complicated shapes it is important that you expand the line around the edge of the shape, rather than just scaling the image up by 0.25mm. If you just scale up the image the shapes will not fit together properly.
Acrylic is brittle, if your fit is too tight then parts can crack. Don’t go too tight! For our machine a 0.12mm adjustment will create a nice fit if you are using a backplate. Wood is more forgiving if you want a super tight fit.
Most acrylic is cast, this can also have an effect on the kerf which is another reason to have a slightly looser fit.
Making acrylic shapes that fit perfectly without having some sort of backplate is extremely hard, we would advise against trying to do this with cast acrylics.